Follow the steps below to set up Arrow for WooCommerce
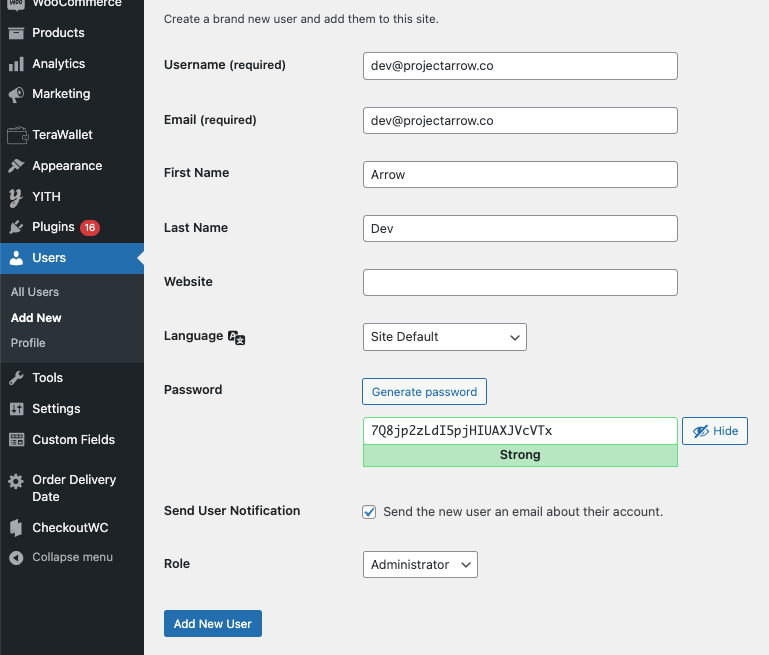
1. Add [email protected] as an admin to your WooCommerce store
Go to 'Users > Add 'New'
Once you have created the account, please provide the auto-generated 'password' to your Customer Success Manager.

2. Arrow developers to perform a site migration onto Arrow's staging server
As your site has advanced theme configuration that could affect basic installation, it is important for Arrow to set up your site in a safe and controlled environment. This allows us to test without any impact to your live site.
We will use one of the leading plug-ins in the market as part of this process. All-in-One WP Migration
3. Arrow developers to produce an installation solution that is compatible with the staging site
This is where we assist with producing an installation solution that ensures Arrow works seamlessly in a way that is compatible with your intended user journey design and site set up. The usual SLA to produce a solution is 1 week.
4. Arrow developers to replicate the solution on your live WooCommerce store
Once the installation solution is produced, Arrow developers would replicate the same implementation on your live site. We will erase the staging site once the replication is complete. We do not keep anything related to your site thereafter.
5. Activate Arrow checkout for your store
Once you're happy with the installation under test mode, we will work with you to turn your store from test mode into live.

Congratulations, you have successfully added Arrow checkout to your store for your shoppers to experience the fastest checkout online!
